
Want to turn your garage floor into a one of a kind design feature?
The Liquid Shine: Everything You Need to Know About Installing Metallic Epoxy Floors
✨Tired of that dull, porous concrete floor in your garage or small commercial space? Looking for something that screams "premium," is incredibly durable, and actually turns your floor into a design feature? Then it’s time to talk about metallic epoxy flooring.
Metallic epoxy is the hottest trend in high-performance flooring, transforming ordinary concrete into a seamless, high-gloss surface that looks like shimmering liquid metal, marble, or even a deep 3D ocean.
What Exactly is Metallic Epoxy?
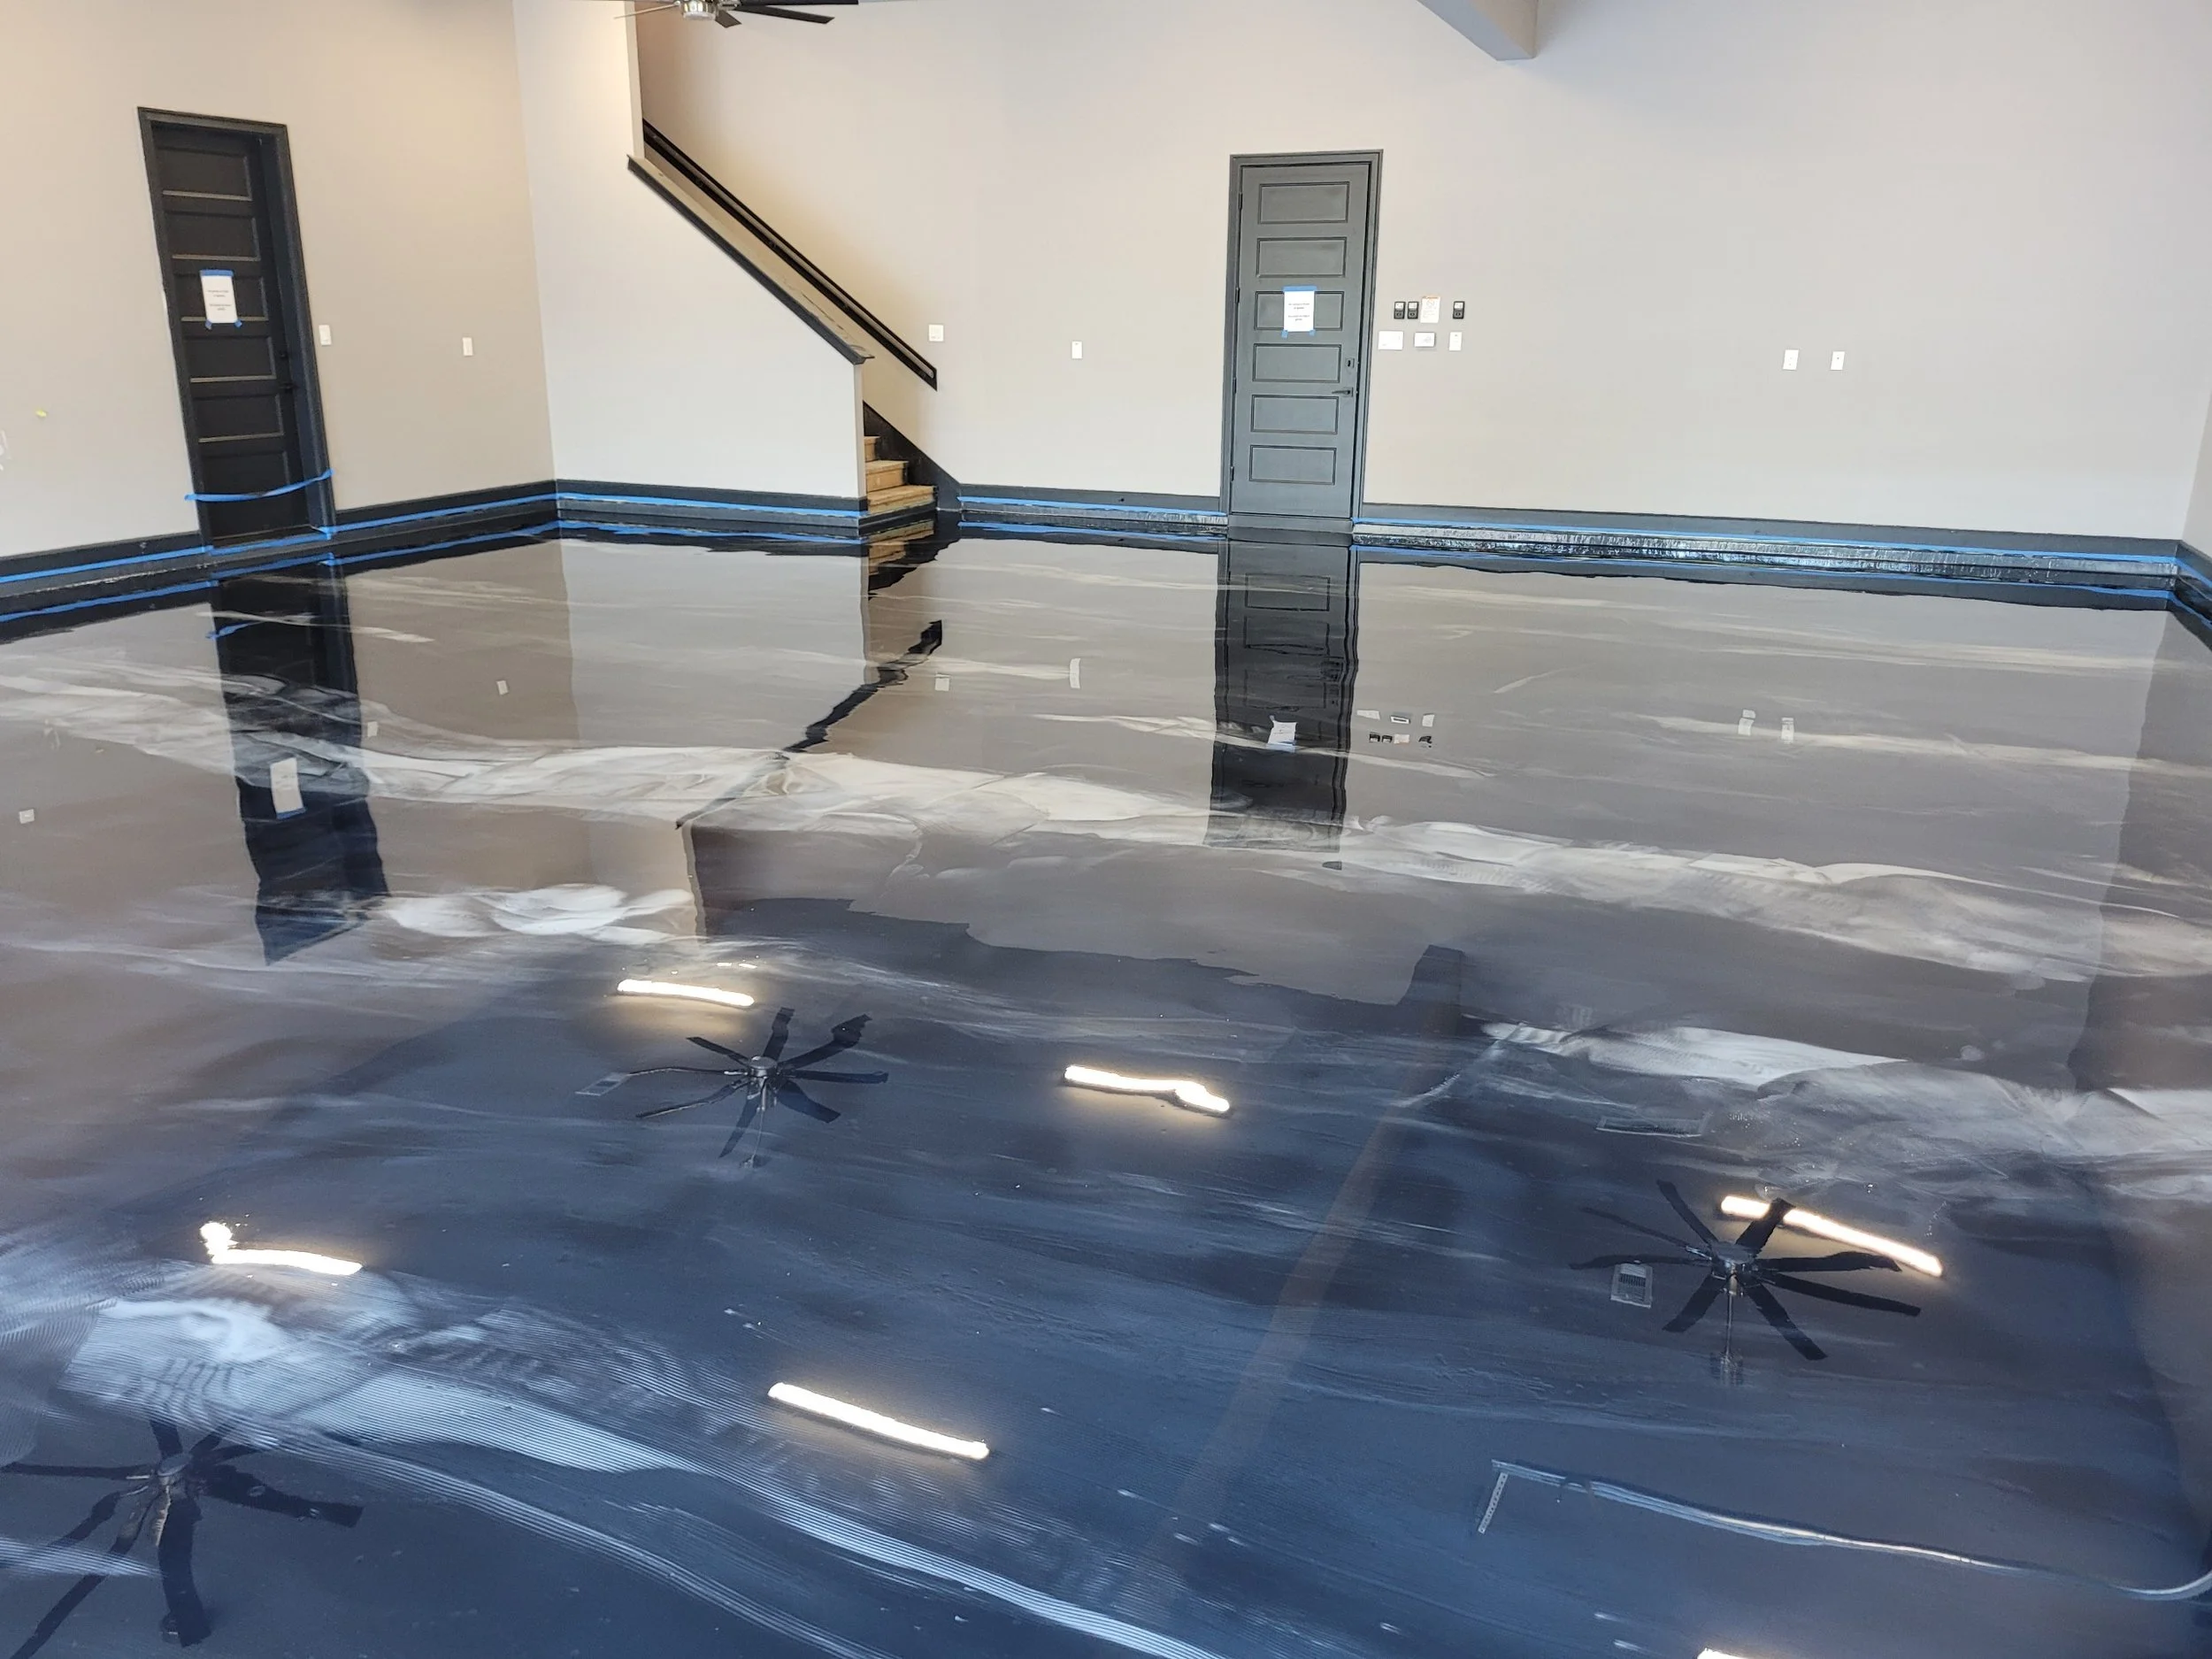
Metallic epoxy is a type of 100% solids epoxy coating that incorporates tiny metallic pigments. When these pigments are mixed into the clear epoxy resin and applied to the floor, they are manipulated using tools like rollers, brushes, and even air blowers. As the epoxy cures, the pigments move, twist, and gather, creating unique, swirling, and multi-dimensional effects. The final look is always unique—no two metallic floors are ever exactly the same!
The Unbeatable Benefits of a Metallic Floor
Metallic epoxy floors are much more than just a pretty face. They offer serious functional advantages perfect for high-traffic areas
🛠️ The Installation Process: A Step-by-Step Overview
While it’s possible for a DIY enthusiast to attempt this, the installation is a detailed, multi-day process that often benefits from professional execution, as mistakes can be very hard to fix!
1. Prep is Paramount (The most critical step!)
The concrete substrate must be clean, dry, and profiled. This usually involves diamond grinding or acid etching to open the pores of the concrete.
Cracks, divots, and spalling must be repaired using epoxy crack fillers.
The floor must be meticulously cleaned and vacuumed to ensure maximum adhesion.
2. The Primer Layer
A base coat (primer) of colored epoxy is applied. This coat seals the concrete and provides a uniform background color that will peek through the metallic topcoat.
3. The Metallic Masterpiece
The 100% solids epoxy is mixed with the metallic pigments and poured onto the floor.
Applicators use rollers, squeegees, and specialized tools to spread the material and—most importantly—move the pigments to create the desired flow and three-dimensional effect. This is where the artistry comes in!
4. The Topcoat (Optional, but Highly Recommended)
Once the metallic layer has cured, a clear polyurethane or polyaspartic topcoat is often applied. This step provides superior UV resistance (preventing yellowing), enhances chemical resistance, and adds another layer of abrasion protection.
5. Curing
The floor is usually walkable in 24 hours, but typically requires 5–7 days before heavy vehicles or equipment can be introduced.
💡 Design Tips for Your Metallic Floor
Color Choice: Lighter colors (silver, white, light blue) tend to reflect more light, while darker colors (copper, black, gunmetal) create a deeper, moodier look.
Layering: For maximum effect, use a different color for the primer coat than your metallic pigments. For example, a black primer with silver metallic pigments creates incredible depth.
Subtlety: You can control how dramatic the "movement" is. Less agitation results in more subtle, consistent color, while heavy manipulation creates intense swirls.
Are you leaning toward a sleek, modern garage or a striking commercial space?